|
|
|
Migrating to Oracle 8i, 9i, 10g, 11g from others database formats
Oracle is a very popular DBMS(Database Management System) in the world. This document describes how to quickly migrate from others database formats to Oracle database in 3 steps using ESF Database Migration Toolkit!
Introduction:
First of all, if you have not installed ESF Database Migration Toolkit:| DMToolkit_x64.zip (63.6 MiB) |
64-bit Windows application for ESF Database Migration Toolkit 11.2.28 (2024-04-10). |
| DMToolkit_win32.zip (58.8 MiB) |
32-bit Windows application for ESF Database Migration Toolkit 11.2.28 (2024-04-10). |
1. After start program, press "Next" button. In "Choose a Data Source" dialog, choose the source database type, e.g. MySQL, MS SQL Server, IBM DB2, PostgreSQL, Teradata, Microsoft Access, Firebird etc. Input the correctly logon information. For MySQL, PostgreSQL, SQL Server, Teradata, IBM DB2: server, port, username, password. You can enumerate all source databases or schemas automation by press "Refresh" button
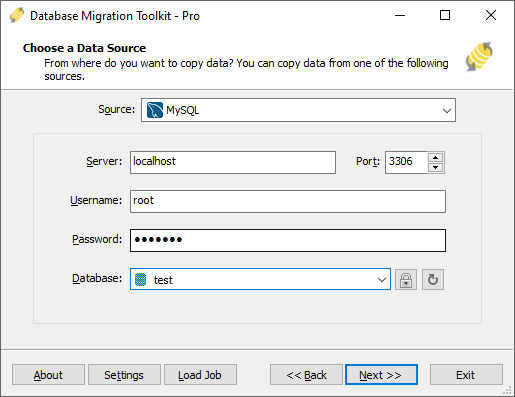
For Microsoft Access, Microsoft Excel, Foxpro etc: press "Browse" to select the source database file or folder(Foxpro).
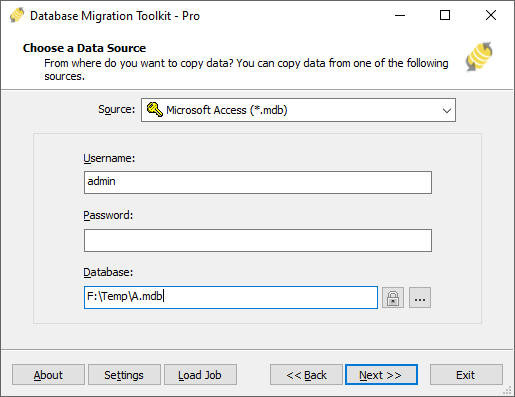
Click "Next" to continue.
2. In "Choose a Destination" dialog, choose "Oracle Database ", input the correctly logon information: Server(host_or_ip_address), Port(e.g. 1521), Username(e.g. system), Password. Choose a connect method(SID or Service_name), it depends on Oracle configuration(defined in tnsname.ora). Input the Oracle instance name(SID) or database name(Service_name), input an new schema or select an exists schename.
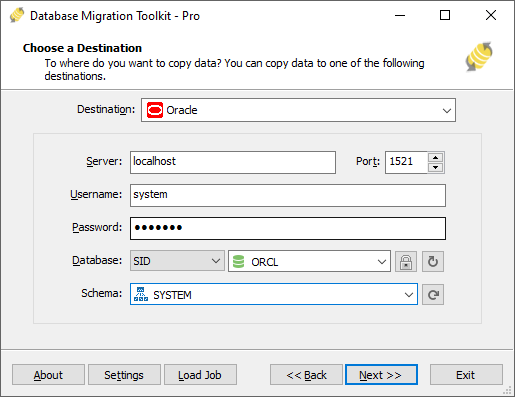
Click "Next" to continue.
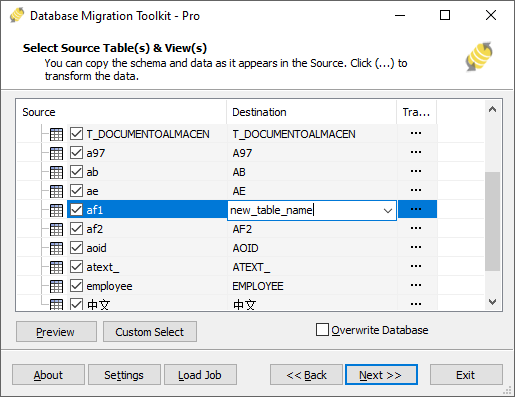
3. In "Select source Tables(s) & View(s)" dialog, it is listing all the tables and views in the source database. You can preview source table data via "Preview" button. Selecting the table(s) or view(s) that you are preparing to migrate to Oracle. In here, you have a chance to change the destination table name at "Destination" column. There is an "Overwrite Database" option below the list (Notice: When you check this option, the destination database will be removed, and all data will lose!). If you want to set more options for migration, click "..." button at "Transform" column immediately.
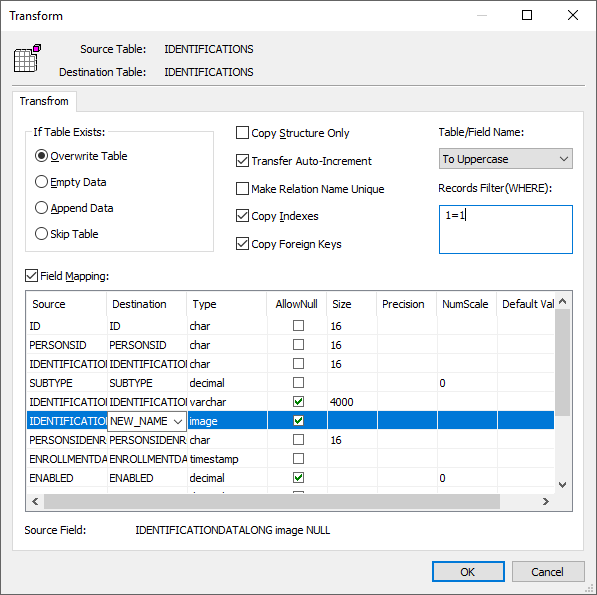
4. In "Transform" dialog, there are some useful options for Oracle migration. You can only migrate the source table structure via check "Copy Structure Only" option or other's options in migrating. You can change the target Oracle field name, data type, default value in "Field Map". Plus, give a data filter (e.g.: id<100 etc) in "Records Filter (WHERE)" option (If you want to migrate all data let this field empty or 1=1) to tell program which records will be migrated. Click "OK" to save your settings.
5. In "Execution" page, click "Submit" to starting the Oracle migration.
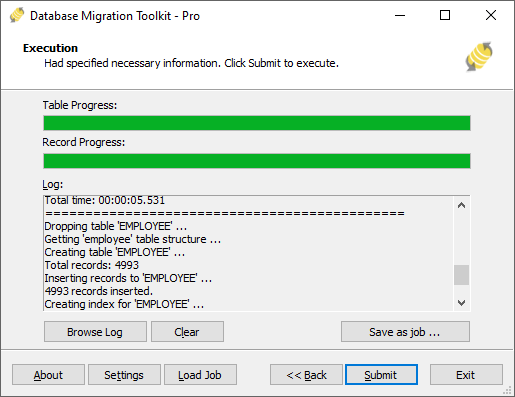
Finished.
If you have any questions or suggestions, please contact us. Thank you for your time!